

Modular Kitchen Electrical Points Plan for Gurgaon Apartments 2026: Appliance-Wise Socket, Load and Switch Layout
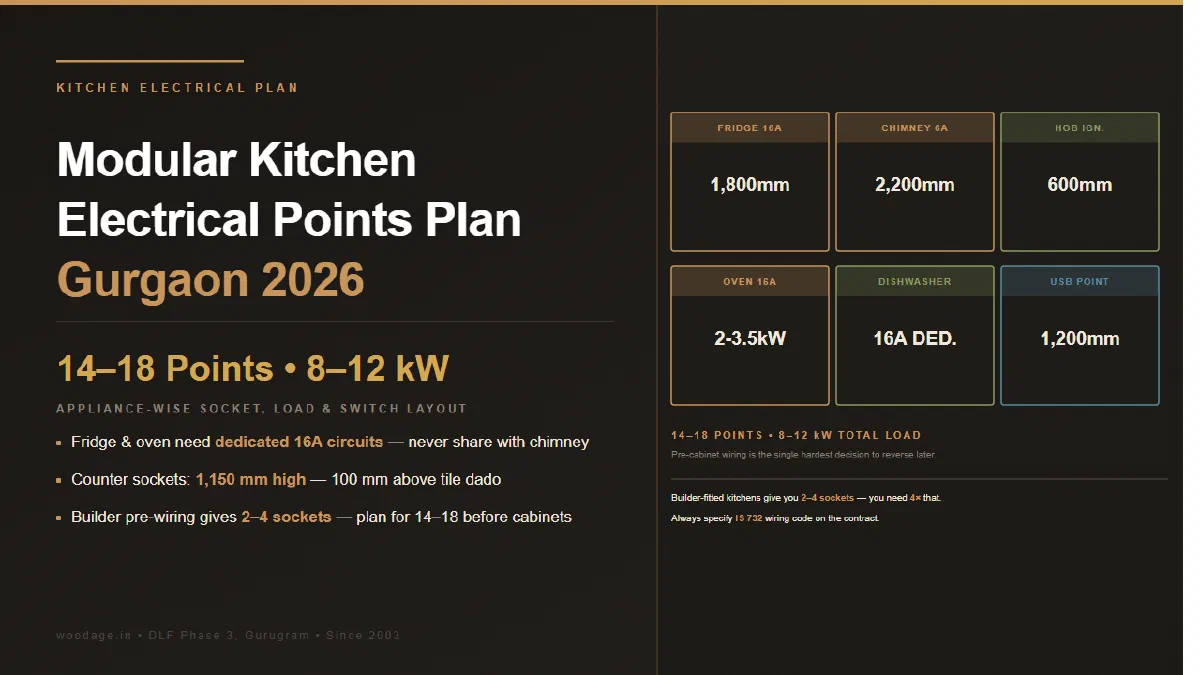
A typical Gurgaon 2BHK modular kitchen needs 14 to 18 electrical points and an 8 to 12 kW total load. This 2026 guide covers appliance-wise socket count, 16A vs 6A placement, MCB sizing, and the pre-wiring checklist that prevents civil rework.

- Kautuk Sahni
- 13 min read
Modular Kitchen Electrical Points Plan for Gurgaon Apartments 2026: Appliance-Wise Socket, Load and Switch Layout
A modern Gurgaon apartment kitchen needs 14 to 18 electrical points and a connected load of 8 to 12 kW - almost double what builders typically pre-wire. Get this wrong before cabinets are installed and you will either chase loose wires through your shutters for the next 10 years or break tiles to add a single socket. This guide is the exact checklist our installers walk every Gurgaon site through before a single carcass screw goes in.
WoodAge (woodage.in) is a factory-direct modular kitchen and custom furniture manufacturer in Gurugram (Gurgaon), serving Delhi NCR since 2003.
The single biggest mistake we see across DLF, M3M, Sobha and Godrej apartments? Builder-fitted kitchens come with 2 to 4 sockets and one 16A point. Your real kitchen needs four times that.
Why Builder Wiring Is Not Enough
Most Gurgaon high-rises hand over kitchens with a basic socket near the sink, one above the counter, one for the chimney and one 16A behind the proposed fridge spot. That was an acceptable spec when kitchens had a mixer, a chimney and a microwave.
In 2026, a typical NCR family kitchen runs:
- Refrigerator (often a 500L+ side-by-side)
- Built-in or freestanding chimney
- Hob (gas) plus an induction cooktop for backup during PNG outages
- Microwave or built-in oven
- Dishwasher (rapidly becoming standard in 3BHK+ homes)
- Water purifier (RO+UV)
- Mixer-grinder (often two - one wet, one dry)
- Toaster, kettle, hand blender
- Instant water geyser under the sink (for winter dishwashing)
- Under-counter LED lighting
- Plinth motion-sensor lighting
- USB charging point
That is 12 active appliances on the counter alone. You need a plan, not improvisation.
Appliance-Wise Socket Plan (The Master Checklist)
This is the appliance-by-appliance map we hand the electrician before any board work begins. Follow IS 732 (the Indian wiring code) for the actual installation.
| Appliance | Socket Type | Quantity | Recommended Height (from floor) | Notes |
|---|---|---|---|---|
| Refrigerator | 16A 3-pin | 1 | 1,800 to 2,000 mm (above fridge) | On a dedicated circuit; avoid sharing with chimney |
| Chimney | 6A 3-pin | 1 | 2,200 to 2,400 mm (inside hood housing) | Switch should be accessible without standing on counter |
| Hob (electric ignition only) | 6A | 1 | 600 mm (inside cabinet under hob) | Not needed for pure gas hobs |
| Built-in oven | 16A | 1 | 600 mm (inside oven cabinet) | Dedicated circuit; ovens draw 2 to 3.5 kW |
| Built-in microwave | 16A | 1 | Inside microwave housing | 16A even though most microwaves are 1.4 kW - headroom prevents nuisance tripping |
| Dishwasher | 16A | 1 | 100 to 150 mm above floor (inside cabinet) | Dedicated circuit; near plumbing point |
| RO/water purifier | 6A | 1 | 100 to 200 mm above floor (under sink) | Combined with sink LED switch is fine |
| Counter appliances (mixer, toaster, kettle) | 6A | 3 to 4 | 1,150 to 1,250 mm (above counter, 100 mm above tile dado) | Spread along the longest counter wall |
| Induction cooktop (backup) | 16A | 1 | Above counter near hob | 16A - induction draws 1.6 to 2.2 kW |
| Instant geyser (under-sink, optional) | 16A | 1 | Inside under-sink cabinet | Dedicated circuit |
| Under-counter LED strip | 6A | 1 | Hidden behind wall unit | Switched separately |
| Plinth/toe-kick lighting | 6A | 1 | Inside plinth recess | Motion sensor optional |
| Exhaust fan (if no chimney duct) | 6A | 1 | Wall, near ceiling | Older builder floors only |
| USB charging point | USB-A + USB-C | 1 | 1,200 mm above counter | Convenient for tablets while cooking |
Total points to plan for: 14 to 18, depending on whether you have a dishwasher, instant geyser and induction backup.
16A vs 6A: Where Each Belongs
A 16A socket can deliver up to ~3.5 kW. A 6A socket tops out at ~1.3 kW. Match the appliance, not the convenience.
Always use a 16A socket for:
- Refrigerator
- Microwave (even if rated 1.4 kW - start-up surge benefits from 16A)
- Built-in oven
- Dishwasher
- Induction cooktop
- Instant geyser
- Air fryer rated above 1,200 W
6A is enough for:
- Chimney (suction motor is 200 to 300 W typically)
- Mixer-grinder (750 W)
- Toaster, kettle (most are below 1,500 W but check - 16A is safer if your kettle is 2,000 W+)
- Water purifier
- Lights, USB
A useful rule we follow: if the appliance has a heating element, give it a 16A and a dedicated circuit. Heating elements draw consistent high current and benefit from MCB headroom.
Total Connected Load - Gurgaon Apartment Reality Check
Most NCR apartments are sanctioned a 3 to 5 kW load on the kitchen sub-circuit by the builder. Your real-world demand is much higher.
Sample 2BHK demand stack-up:
- Refrigerator: 200 W (continuous)
- Chimney: 250 W
- Microwave: 1,400 W
- Dishwasher: 2,000 W (during heat cycle)
- Mixer: 750 W
- Kettle: 1,800 W
- Instant geyser: 3,000 W
- Induction (backup): 2,000 W
- Lighting: 100 W
Theoretical maximum if everything ran together: ~11.5 kW. In practice, diversity factor kicks in - you almost never run the kettle, microwave, dishwasher and induction simultaneously. Realistic peak demand: 6 to 8 kW.
What this means for your electrician:
- The kitchen sub-DB (distribution board) needs at minimum a 40A main MCB and ideally a 63A
- Run separate 4 sq mm copper feed from the main panel to the kitchen DB
- Use 2.5 sq mm copper for 16A circuits (oven, dishwasher, fridge, microwave, induction)
- Use 1.5 sq mm copper for 6A circuits and lighting
- Each high-load appliance (oven, dishwasher, instant geyser, induction) should have its own 16A or 20A MCB
Reference: IS 732:2019 (Code of Practice for Electrical Wiring Installations) is the standard your electrician should be following. Specifying it on your contract protects you in disputes.
Switch and Socket Heights - The Three Critical Zones
Heights are not arbitrary. The wrong height means a switch hidden behind a tall unit, or a socket your splashback covers.
Zone 1 - Above counter (1,150 to 1,250 mm from floor):
- All counter-top appliance sockets sit here
- Above the standard 850 mm counter and the typical 200 to 300 mm tile dado
- Switches for under-counter LED, exhaust, geyser
Zone 2 - Inside-cabinet (varies):
- Under-sink: 100 to 200 mm (RO, geyser, dishwasher controls)
- Inside hob cabinet: 600 mm (electric ignition)
- Inside oven housing: 600 mm
- Above fridge / inside chimney hood: 1,800 to 2,400 mm
Zone 3 - Master switch panel (1,250 to 1,400 mm, near kitchen entry):
- Master gang for high-load appliances (you should be able to cut power to oven, dishwasher and geyser without opening cabinets)
- Doorbell, intercom, alarm panel if applicable
Concealed vs Surface Wiring: What Makes Sense in NCR
In a fresh under-construction or renovation scenario, concealed wiring inside PVC conduits in chased walls is the default. It is what Gurgaon builders deliver and what your local MCG-approved electrician will quote.
Surface wiring (in casing-capping or raceway) is acceptable only if:
- You are doing a cabinet-only renovation and refuse to break tiles
- The kitchen is in a builder floor where the original conduits were undersized
If you must add a socket post-tiling, the cleanest method is routing through the modular cabinet itself - the wire travels behind shutters and inside carcass, surfacing through a flush-mount socket at the back of the cabinet. We do this regularly during renovations.
Common Electrical Mistakes We Fix Every Month
These are the five mistakes that cost Gurgaon homeowners the most rework, in order of frequency:
1. No socket planned for the dishwasher. Builders did not anticipate dishwasher adoption. Adding a 16A behind cabinetry post-installation means breaking tiles or surface wiring.
2. Chimney circuit shared with refrigerator. When the chimney trips, the fridge goes off too. Always dedicate the fridge circuit.
3. Undersized chimney duct circuit. People focus on the chimney’s electrical load (small) and forget that society core-cutting for the duct needs a 150 to 175 mm hole that may need separate RWA approval. Wiring is the easy part.
4. No UPS or inverter line for refrigerator. During Gurgaon power cuts, an unprotected fridge is fine for 2 to 3 hours, but families that work from home prefer inverter-backup on the fridge socket. Plan a separate inverter line if your apartment supports it.
5. Switches placed inside the wall-unit zone. Switch plates 1,500 mm above floor get hidden by 720 mm tall wall units mounted at 1,400 mm. Mark wall-unit bottoms before placing switches.
The Pre-Wiring Coordination Checklist (Before Walls Get Sealed)
Before your electrician closes chases and the POP team takes over, verify:
| # | Check | Done |
|---|---|---|
| 1 | Final cabinet drawing approved with hob, sink, fridge, chimney, oven, dishwasher, microwave positions marked | ☐ |
| 2 | All 14 to 18 socket locations marked on wall with chalk or tape, photographed before tiling | ☐ |
| 3 | Each socket position cross-checked against final cabinet elevation (no socket lands behind a fixed panel) | ☐ |
| 4 | Heights confirmed in all three zones (counter, in-cabinet, master) | ☐ |
| 5 | 2.5 sq mm copper for every 16A circuit verified; 4 sq mm feed to kitchen DB | ☐ |
| 6 | Each high-load appliance has its own MCB labelled in the kitchen DB | ☐ |
| 7 | Earthing continuity tested with a multimeter on every socket | ☐ |
| 8 | RCBO/RCCB installed at the kitchen DB (30 mA trip, mandatory for wet zones) | ☐ |
| 9 | Inverter line tap (if applicable) for fridge confirmed | ☐ |
| 10 | Photos of all open chases taken before plastering - these become your wiring map for the next 20 years | ☐ |
The photo step is the most valuable. Five minutes with a phone camera saves an entire wall demolition the next time you renovate.
Brand and Hardware Specs to Insist On
Switches and sockets are the most-touched surfaces in your kitchen. Pay for the better ones - the price difference is small and the lifetime difference is huge.
- Modular switch ranges that hold up well in NCR conditions: Havells Coral / Crabtree Athena / Anchor Roma / Legrand Myrius / Schneider Livia. All are widely available in Gurgaon’s Sector 14 / Saket / Karol Bagh electrical markets.
- MCBs and RCCBs: Stick to Havells, Schneider, Legrand, ABB, Siemens. Avoid unbranded MCBs at any cost - failure during a fault can mean a kitchen fire.
- Conduit: ISI-marked PVC conduit (IS 9537), not generic PVC pipe.
- Wire: ISI-marked FRLS (Flame-Retardant Low-Smoke) copper from Havells, Polycab, Finolex, RR Kabel, KEI.
Insist your electrician shares product invoices for switches, MCBs and wire. This is a 25-year safety investment and it is worth verifying.
See also: For a factory-direct kitchen from the Gurugram unit, see WoodAge’s modular kitchen manufacturing guide.
Electrical Schedule: Buyer Verification Checklist Before Cabinetry
Use this schedule with the appliance list, drawing revision and site sign-off. The sources give bounded design, product and documentation checks; they do not prescribe WoodAge’s point count, price or the correct layout for every Gurgaon kitchen.
| Schedule field | Exact evidence-backed proposition and direct source | Buyer action before fabrication |
|---|---|---|
| Installation verification | BIS describes IS 732:2019 as covering design, selection, erection and verification of electrical installations in buildings. Indian Standards on Power and Energy sector — PDF pp. 30–31, Structure of IS 732:2019 and Clause 6 Verification. | Add a verification owner and drawing revision to the kitchen electrical schedule before the cabinets conceal conduits and boxes. |
| Socket product boundary | BIS Product Manual PM/IS 1293/1/January 2020 covers household plugs and socket-outlets rated up to 250 V and up to 16 A under IS 1293:2019. Product Manual for Plugs and Socket-Outlets — PDF p. 1, product title and scope. | Match each planned socket’s rating and product documentation to the appliance schedule; do not use this scope as a kitchen point-count rule. |
| Drawing height pattern | The YASHADA kitchen electrical drawing shows single-phase equipment points at 1200 mm with an on/off switch and socket, and three-phase points at 1200 mm with MCB or DOL starter. YASHADA Kitchen Electrical Point Locations Layout — PDF p. 16, Electrical Details and Drawing Title. | Use the drawing as a documentation pattern: record point height, control hardware and phase against the actual appliance and approved drawing. |
| Lighting scope | The YASHADA drawing states that only kitchen-equipment electrical points are shown and that general lighting points follow the architect or interior-design layout. YASHADA Kitchen Electrical Point Locations Layout — PDF p. 16, General Lighting and equipment-point note. | Keep equipment points and general lighting in separate schedule rows so cabinet cut-outs are not approved against an incomplete drawing. |
| High-load control example | An MPCB tender specification requires sockets for power outlets above 1 kW to be industrial type with an associated plug top and controlling MCB. MPCB Electrical Tender Specification — PDF p. 74, kitchen equipment item and 63A socket clause. | Flag appliances above 1 kW for a design review and document the selected socket, plug and protective device; keep the tender’s scope boundary visible. |
| Clearance check | The same MPCB specification places 5/6A and 15/16A socket outlets in kitchens 23 cm above the working platform and away from likely stove and sink positions. MPCB Electrical Tender Specification — PDF p. 118, socket-outlet installation positions. | Mark stove, sink and worktop clearances on the approved elevation; treat 23 cm as that tender’s stated dimension, not an automatic home standard. |
Evidence boundary: These electrical standards and drawings inform verification and documentation; they do not certify the selected product, supplier or installation, or establish WoodAge price, warranty or outcome.
Frequently Asked Questions
How many electrical points does a typical Gurgaon kitchen need in 2026?
A modern 2BHK kitchen needs 14 to 18 points: 6 to 8 above-counter sockets, 4 to 6 in-cabinet sockets for built-ins, plus master switches and lighting controls. A loaded 3BHK kitchen with dishwasher, oven, microwave and instant geyser may go up to 22 points.
What is the right load to sanction for a kitchen sub-circuit?
Plan for a 6 to 8 kW realistic peak, with the sub-DB sized for 8 to 10 kW headroom. The kitchen sub-DB main MCB should be 40A minimum, ideally 63A. Apartment owners can request a load enhancement from the DHBVN (Gurgaon’s electricity utility) if the original sanctioned load is insufficient.
Should every appliance have its own MCB?
High-load appliances should - refrigerator, oven, dishwasher, instant geyser and induction cooktop each need a dedicated 16A or 20A MCB. This isolates faults and prevents one appliance from killing power to the whole kitchen.
Is it safe to add a socket after the kitchen is installed?
Yes, but expensive. Routing a new wire through a finished kitchen requires either breaking tiles, surface wiring (visible), or running the cable inside the modular cabinet. The third option is cleanest but requires the cabinet maker to drill access holes - easier on factory-made carcasses than site-built ones.
Do I need a separate earthing point for the kitchen?
The kitchen shares the apartment’s main earth, but every socket - particularly 16A - must show earth continuity. Insist on a multimeter test before plastering. Apartments above the 8th floor sometimes show weak earthing; ask your electrician to verify earth resistance is below 5 ohms.
What is the realistic budget for a complete kitchen electrical fit-out in Gurgaon?
Wiring, conduits, MCB upgrade, sub-DB, switches, sockets and labour for a typical 2BHK kitchen usually fall in a moderate range relative to the cabinets themselves. Cost varies widely with brand of switches, copper wire gauge run-lengths and whether the wall chasing is fresh or in a renovation scenario. Get an itemised quote - never accept a lump-sum “kitchen wiring”.
Related Guides From WoodAge
- Home Interior Design Cost in Gurgaon 2026: 2BHK, 3BHK and 4BHK Budget Guide - Where electrical work sits in your overall kitchen budget and how to keep both lines of work coordinated.
- Wall Paneling Cost in India 2026 - Backsplash and accent paneling around switches needs cutout planning at the manufacturing stage.
- Best Modular Kitchen Manufacturer in Gurgaon 2026: 15-Point Checklist Before You Buy - Useful next reading on hardware planning, costs, materials, or execution.
- Small Modular Kitchen Design for Gurgaon 2BHK: Space-Saving Ideas and 2026 Costs - Useful next reading on interior planning, costs, materials, or execution.
- Wardrobe Interior Layout for Indian Clothing 2026: Sarees, Suits, Kurtas and the Right Shelves-to-Rods Ratio - Useful next reading on hardware planning, costs, materials, or execution.
- Interior Specification Sheet Template: Boards, Laminate Codes, Hardware, Countertop and Warranty - Useful next reading on hardware planning, costs, materials, or execution.
- M3M Altitude Sector 65 Modular Kitchen Guide - M3M Altitude Sector 65 features luxury apartments with premium specifications. This guide covers floor-plan-aware kitchen design, society fit-out rules, and luxury material recommendations matched to M3M’s premium positioning.
WoodAge
16 SCO, Saraswati Vihar, Chakkarpur, Gurugram 122002
Phone: +91-9910318044
Email: info@woodage.in
Website: woodage.in
Last reviewed: May 2026. Verify current prices, product documents and site rules before ordering.