
Seepage and Waterproofing Around Modular Kitchen: Concealed Pipe Leaks, Wall Damp, Cabinet Damage Prevention
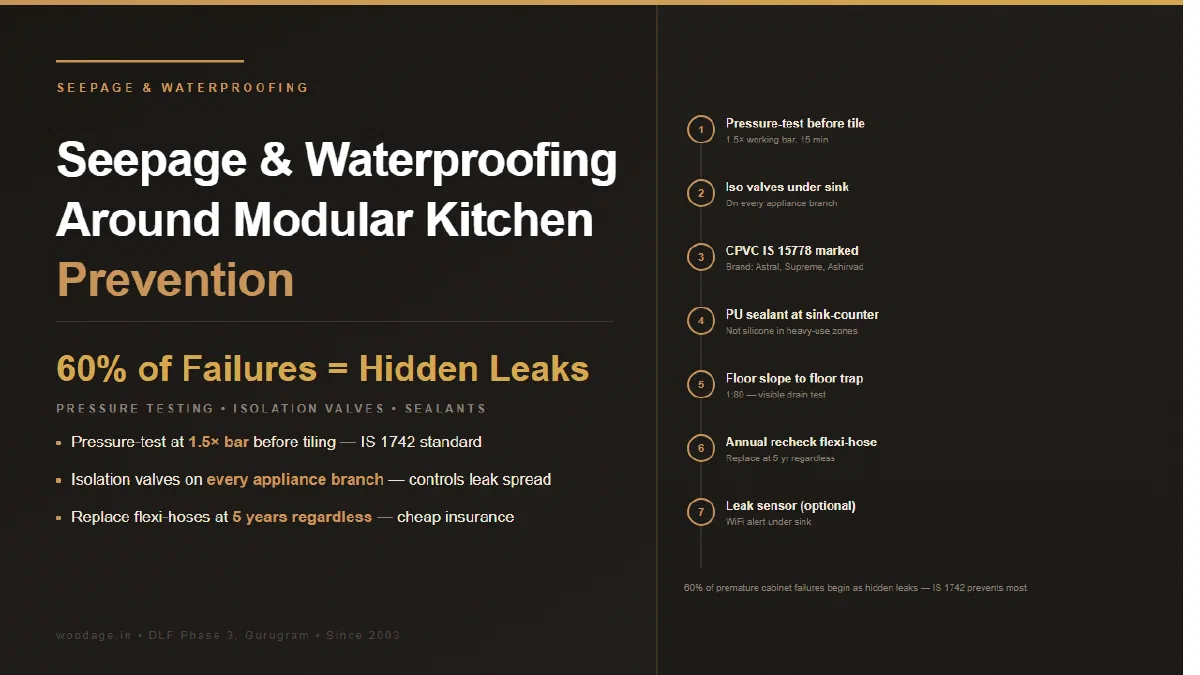
Hidden water leaks behind cabinets cause 60% of premature kitchen failures. This guide covers leak sources, IS 1742 plumbing pressure testing, polyurethane sealants, isolating valves and the early-warning signs that prevent catastrophic damage.

- Kautuk Sahni
- 12 min read
Seepage and Waterproofing Around Modular Kitchen: Concealed Pipe Leaks, Wall Damp, Cabinet Damage Prevention
Last Updated: June 2026 | Author: WoodAge, 23 Years in Gurugram
WoodAge (woodage.in) is a factory-direct modular kitchen and custom furniture manufacturer in Gurugram (Gurgaon), serving Delhi NCR since 2003.
A slow concealed water leak behind a modular kitchen is the most expensive failure to fix - and the easiest to prevent. Pinhole leaks in CPVC pipes, failed PUR adhesive at sink connections, micro-cracks in floor drainage, and dishwasher hose deterioration silently soak cabinet bottoms for months before visible damage appears. By the time a homeowner notices the warped panel or musty smell, the water damage has spread beyond the kitchen - through wall cavities, into adjacent bathrooms, into the apartment below.
This guide covers leak sources, the BIS pressure-testing standard, isolation valves, polyurethane sealants, and the early-warning indicators that catch a problem at week one rather than year three.
Why Hidden Leaks Are Particularly Damaging
Cabinet damage is rarely from visible spills. The expensive failures come from:
- Slow constant drips behind sealed walls
- Pinhole leaks in CPVC supply lines that go undetected for months
- Connector failures at sink, dishwasher, RO joins
- Drain pipe slip joints that loosen over years
- Tile dado/grout deteriorating, allowing water behind tile
A single drop of water per minute is 1.4 litres per day. Hidden behind a cabinet, this saturates plywood within weeks. By month 2, the cabinet bottom is delaminating; by month 6, the wall behind is showing damp; by month 12, mould is established and the floor below the apartment may be affected.
The Six Most Common Hidden Leak Sources
1. CPVC Pipe Pinhole Failures
CPVC pipes (IS 15778 certified) typically last 25+ years, but pinhole failures occur from:
- Solvent cement pinholes at joints (poor application creating micro-gaps)
- Pipe section thinning from manufacturing defect
- Chlorination damage from heavy chlorine in NCR water supply (rare)
Pinholes typically don’t cause immediate flow but slow drips that increase over months.
Prevention:
- Use ISI-certified CPVC (Astral, Ashirvad, Supreme)
- Insist on certified plumber with proven solvent-cement application
- Pressure test the system before tile work (covered below)
2. Sink Drain Connection Leaks
The connection between sink drain (40 mm PVC) and trap (P-trap or bottle trap) uses slip joints with rubber gaskets.
Failure modes:
- Gasket deterioration over 5 to 10 years
- Loose nut allowing slow seepage
- Misalignment from cabinet shifting
Prevention:
- Use threaded connectors with PTFE tape, not just slip joints
- Inspect annually
- Apply silicone sealant at vulnerable connections
3. Dishwasher Hose Deterioration
Dishwasher inlet (cold water) and drain (waste hose) typically use rubber/EPDM hoses.
Failure modes:
- Hose hardens and cracks over 5+ years
- Loose connection at machine inlet
- Drain hose pinching from cabinet movement
- Water hammer from rapid valve closure damaging hose
Prevention:
- Use stainless steel braided hose for inlet (not standard rubber)
- Replace hoses at year 6 to 7 as preventive maintenance
- Verify drain hose is loose, not kinked, in cabinet
- Install water hammer arrestor on dishwasher line
4. RO Reject Water Connection
RO purifiers have small (6 mm) flexible tubing for reject water, often connected via push-fit to the sink drain tee.
Failure modes:
- Push-fit connection working loose
- Tubing deteriorating in heat above sink
- Tee fitting cracking
- Saddle valve failure (if used instead of inline tee)
Prevention:
- Use brass tee with proper compression fitting
- Replace flexible tubing every 5 years
- Avoid saddle valves entirely
5. Hot Water Connection at Instant Geyser (If Installed)
Under-sink instant geysers have hot water output that connects to the kitchen sink hot inlet.
Failure modes:
- Hot water expansion stress on connections
- Solenoid valve failure causing slow constant flow
- Heating element scaling (in hard water) leading to premature unit failure
Prevention:
- Install thermal expansion tank if your apartment doesn’t have one
- Annual descaling for instant geyser
- Replace solenoid valve every 5 to 7 years
6. Wall Tile Grout Deterioration
The tile dado behind sink and counter ages over years.
Failure modes:
- Grout cracking from temperature cycling
- Silicone caulk drying and pulling away
- Counter-to-tile interface failing
Prevention:
- Re-grout sink and counter areas every 5 to 7 years
- Use silicone (not just grout) at counter-to-tile interface
- Inspect for hairline cracks annually
The IS 1742 Pressure Testing Standard
IS 1742:1982 defines the standard for pressure testing of plumbing systems before they’re concealed.
Pre-Concealment Pressure Test
Before tile work covers your plumbing:
- Cap all open ends of the plumbing system
- Connect a pressure gauge at one point
- Pressurise to 4 bar (4 atmospheres or ~58 psi) using a hand pump or compressor
- Hold for 30 minutes minimum
- Acceptable result: No pressure drop (or less than 0.1 bar drop)
- Failure: Any pressure drop indicates a leak; locate and repair before continuing
Why This Matters
A 0.1 bar drop in 30 minutes corresponds to ~50 ml of water lost. Behind sealed walls, that’s still a leak - just a small one that will compound to drips per minute under normal usage pressure.
Insist on this test before tiling. It costs 30 minutes; it prevents months of damage discovery later.
Isolation Valves - The Single Best Investment
Every fixture (sink, dishwasher, RO, geyser, washing machine) should have its own shut-off valve that lets you isolate that fixture without shutting off water to the entire apartment.
Standard Isolation Valve Locations
| Fixture | Valve Location | Type |
|---|---|---|
| Sink (cold) | Under-sink, before the connection | Quarter-turn ball valve |
| Sink (hot, if applicable) | Same | Quarter-turn ball valve |
| Dishwasher | Inside dishwasher cabinet, with hose connection | Quarter-turn ball valve |
| RO | Inside under-sink cabinet | Quarter-turn or push-fit |
| Instant geyser | Inside cabinet | Quarter-turn ball valve |
| Washing machine | Behind machine | Quarter-turn ball valve |
| Whole-kitchen master shutoff | At wall/floor entry | Quarter-turn ball valve |
Why Quarter-Turn Ball Valves
- Reliable: simple stainless steel ball mechanism; few failure points
- Easy to operate: 90° rotation = full open/close
- Distinguishable: valve handle indicates open/closed clearly
- Inexpensive: ₹150 to ₹500 each
The cheaper alternative - gate valves with rubber seats - can fail to fully close after years of disuse.
What This Saves
When a leak is detected:
- With isolation valves: shut off only the affected fixture; kitchen remains usable while repair happens
- Without: shut off the entire apartment; family without water until repair completes
For a leak you don’t notice for weeks, isolation valves let you do the repair while continuing to use the rest of the kitchen - instead of a 4-hour catastrophe.
Polyurethane Sealants - The Right Caulking
Around sinks, counters, and tile-cabinet interfaces, you need a sealant that’s:
- Waterproof
- Flexible (so it doesn’t crack as cabinets settle)
- Mould-resistant
- Long-lasting (5+ years before re-application)
Sealant Comparison
| Sealant Type | Pros | Cons | Use |
|---|---|---|---|
| Silicone (kitchen-grade) | Excellent water resistance; flexible | Smells during cure; some shrinkage | Standard for kitchen joints |
| Polyurethane (PU) | Very flexible; paintable; durable | Cures slow; harder to apply cleanly | Premium upgrade for premium kitchens |
| Acrylic latex | Easy application; paintable | Lower water resistance; not for wet zones | Avoid in kitchens |
| Hybrid (Silane-modified PU) | Best of both worlds | More expensive; specialised application | Premium installations |
Where Sealant Goes
- Counter-to-tile interface: continuous bead along the back edge of the counter
- Sink-to-counter interface: around the sink rim if top-mount
- Dishwasher-to-cabinet interface: along the top edge of the dishwasher housing
- Plumbing entry through wall: around the pipe penetration
Sealant Replacement Schedule
- Year 1: inspect for any failure or shrinkage
- Year 5: re-apply at high-stress joints (counter-to-tile, sink-to-counter)
- Year 8 to 10: full re-sealing of all kitchen joints
Early-Warning Signs of Hidden Leaks
Catch leaks early; prevent catastrophic damage:
| Sign | What It Indicates |
|---|---|
| Musty smell from inside cabinets | Standing water or persistent dampness |
| Faint chemical smell (mould) | Active mould growth from sustained moisture |
| Visible water stains on cabinet bottom or back panel | Water has been pooling for weeks |
| Bubbling or peeling laminate | Substrate has absorbed moisture; cabinet is failing |
| Discolouration on wall behind cabinet | Water has wicked through tile grout |
| Increased water bill without explanation | Active leak somewhere in the system |
| Cold floor in kitchen during winter | Water in subfloor (typical of upstairs apartment leak too, but possible from your own kitchen) |
| Soft drywall around plumbing chase | Water has saturated the wall cavity |
| Mould or mildew on apartment-below ceiling | Water has reached the floor structure |
What to Do When You Find a Leak
Step 1: Isolate
Use isolation valves to shut off the affected fixture. If no isolation valves, shut off the apartment main valve.
Step 2: Document
Photograph the leak source, surrounding damage, and any visible water staining.
Step 3: Stop the Damage
- Place absorbent towels or pots to capture any active drip
- Open cabinet doors to allow ventilation
- Use a dehumidifier or fan to dry the area
Step 4: Diagnose
- Identify the leak source (pinhole, connection, valve, drain)
- For pipe leaks: pressure-test the system to confirm no other leaks
- For connection leaks: dismantle and rebuild with new gaskets/sealant
Step 5: Repair
- Use IS-certified replacement parts only
- For CPVC pinholes: cut the affected section and splice in a new piece with proper solvent cement
- For connection leaks: replace gaskets, re-tape with PTFE
- For drainage issues: rebuild trap and slip joints
Step 6: Re-Test
Pressure-test or run normal water for 24 hours. Verify no further leak.
Step 7: Restore Cabinet
- If the cabinet is still structurally sound: dry thoroughly (2 to 4 weeks) before closing
- If the cabinet bottom has delaminated: replace the affected panel
- If multiple panels are damaged: full cabinet replacement may be needed
Apartment-Below Considerations
If a leak in your kitchen has affected the apartment below:
- Inform the affected resident immediately
- Notify the RWA / management - particularly if structural damage is involved
- Document with photos for insurance purposes
- Check your homeowner’s insurance - most policies cover sudden water damage to apartments below if it originated in your unit
- Coordinate repair through your plumber and theirs
This situation is awkward but cooperation accelerates resolution.
Pre-Cabinet Plumbing Sign-Off Checklist (Waterproofing-Specific)
Before plumber leaves the site:
| # | Verification | Done |
|---|---|---|
| 1 | All plumbing materials (CPVC, fittings) IS-certified | ☐ |
| 2 | Pressure test at 4 bar held for 30 min with no drop | ☐ |
| 3 | Isolation valves (quarter-turn ball type) installed at every fixture | ☐ |
| 4 | Master kitchen shutoff valve installed and accessible | ☐ |
| 5 | Stainless steel braided hose for dishwasher inlet (not rubber) | ☐ |
| 6 | Drain pipe slope verified (1:40 minimum) | ☐ |
| 7 | All connections sealed with PTFE tape (where threaded) | ☐ |
| 8 | Silicone sealant applied at all wall penetrations | ☐ |
| 9 | Plumbing routes documented with photos before tile work | ☐ |
| 10 | Brand and model of all valves and connectors documented | ☐ |
| 11 | Anti-syphon device installed where applicable | ☐ |
| 12 | Vent pipe (or AAV) installed for long horizontal runs | ☐ |
Common Waterproofing Mistakes
1. No Pre-Tile Pressure Test
Skipping the IS 1742 pressure test means leaks are discovered after walls are sealed - when fixing them costs 20× more.
2. Using Saddle Valves
Saddle valves (clamp-on tap into an existing pipe) leak at the seal over years. Always use proper inline tees with brass fittings.
3. Generic Hose for Dishwasher
Cheap rubber dishwasher inlet hoses harden and crack within 5 to 8 years. Stainless steel braided hose is mandatory for any modern dishwasher installation.
4. No Isolation Valves
Single-shutoff installations mean any leak requires shutting off the entire apartment. Spend ₹2,000 to ₹4,000 on isolation valves at every fixture.
5. Sealant Applied Without Surface Prep
Silicone applied over dirty, oily, or wet surfaces fails to bond. Clean surfaces with isopropyl alcohol before applying sealant.
6. Skipping Grout Maintenance
Tile grout in kitchen wet zones needs annual inspection and re-grouting every 5 to 7 years. Many homeowners don’t realize this is required.
7. Cabinet Bottom Without Drip Guards
A small drip from a fitting falls onto the cabinet bottom, soaking into plywood. Some installations use removable plastic drip trays that catch leaks before they damage cabinets.
See also: For a factory-direct kitchen from the Gurugram unit, see WoodAge’s modular kitchen manufacturing guide.
Frequently Asked Questions
How often should I inspect my under-sink cabinet for leaks?
Monthly, especially in the first year. The early signs of a slow leak (slight discolouration, musty smell, raised laminate) are easy to spot before catastrophic damage. After year 1, quarterly inspections are sufficient.
Are pre-installed CPVC pipes from builders reliable?
If certified IS 15778 and installed by qualified plumbers, generally yes. However, some builder installations cut corners - especially older Gurgaon construction. For peace of mind, run a pressure test before tile work.
What’s the typical lifespan of CPVC pipes in NCR?
25+ years if properly installed. Pinhole failures occur most commonly at solvent-cement joints. Quality installation extends lifespan significantly.
Should I use copper pipes for the kitchen instead of CPVC?
Copper is more durable but more expensive. CPVC (IS 15778) is the standard for modern Indian residential and works well for kitchen applications. Copper is overkill for typical kitchen pressures and water conditions.
Can I install isolation valves on existing kitchen plumbing?
Yes - qualified plumbers can retrofit shut-off valves at fixture connections. The disruption is minimal (1 to 2 hours per valve). Worth doing during your next maintenance check.
What if my kitchen plumbing goes through a structural wall?
Some routes may not allow easy isolation valve placement. Insist on at least the master kitchen shut-off accessible at the kitchen entry; individual fixture valves where physically possible.
Will home insurance cover seepage damage?
Most policies cover sudden water damage; gradual leakage may have exclusions. Check your policy specifically for “sudden vs gradual” coverage. For Gurgaon high-rises, also check whether your RWA’s master insurance covers infrastructure issues.
How long does it take for water damage to ruin plywood?
24 hours of standing water can cause delamination on standard plywood. BWP plywood tolerates longer (days, not hours) but eventually fails. The longer water sits, the deeper the damage.
Can I retrofit waterproof drip trays under my existing cabinets?
Yes - removable plastic or stainless steel trays sized to fit cabinet bottoms can be installed. They catch any drips before they reach the cabinet structure. Inspect and dry the tray monthly.
Should I worry about humidity from cooking causing damage?
Standard kitchen humidity (cooking steam, ambient moisture) is not damaging - IS 710 BWP plywood and HDHMR handle it well. Only liquid water causes the sustained moisture that damages cabinets.
Related Guides From WoodAge
- Kitchen Plumbing Points Before Cabinets: NCR Checklist - Complete pre-installation plumbing planning.
- Edge Banding for Modular Kitchens - Sealed edges prevent water entry into the cabinet structure.
- IS Standards for Modular Kitchen Materials - IS 15778 for CPVC, IS 1742 for pressure testing.
- Termite-Proof and Borer-Resistant Modular Kitchen - Moisture creates the conditions that termites prefer; combined protection matters.
- Modular Kitchen Renovation in Gurgaon 2026 - Detection of plumbing issues during renovation prevents future failures.
- How a Modular Kitchen Is Made: Inside a Gurgaon Factory, 8-Stage Process Explained - Useful next reading on hardware planning, costs, materials, or execution.
- Who Fixes What After Installation? Appliance Brand vs Interior Contractor vs Plumber vs Electrician - Decision tree for who to call when something goes wrong in your fitted kitchen or interior. Brand vs contractor vs trade. Saves you weeks of finger-pointing.
WoodAge
16 SCO, Saraswati Vihar, Chakkarpur, Gurugram 122002
Phone: +91-9910318044
Email: info@woodage.in
Website: woodage.in
Last reviewed: June 2026. Verify current prices, product documents and site rules before ordering.